Tuesday, December 7, 2010

Rhododendrons - Part 2


Rhododendron 'David Waldman'

This is probably my favorite Rhododendron (azalea?). Can't remember which this one is and since I can't see the stamens, I'll just leave it as a pretty flower. It is named after David Waldman who owned Roslyn Nursery before he and Harriet retired.

Today's rhododendron information is on planting them and keeping them happy. According to Harold Greer who is a recognized expert on Rhododendrons, there are 3 things all rhododendrons want: A constant supply of water, well-drained soil (not a contradiction here - they need ample water and don't want to dry out, but standing water will quickly do them in, especially during hot weather), and an acid soil with a pH of 5-6 that is coarse enough for the roots to have access to oxygen.

A little more explanation on these. The water thing. Rhododendrons are one of those plants that draw water all year 'round. In places like here where the ground freezes, this presents a problem. A good mulch helps, but they also have their own defense. Remember the picture of curled leaves I posted yesterday? That's why they do it. To keep from losing water in their leaves that they aren't going to be able to replace from the frozen soil. There are treatments for the leaves that help seal them from moisture loss, but I've never tried them and find that the plants take care of themselves. In more severe climates, especially where the rhododendron will be exposed to a lot of wind, a screen of burlap is a good idea. A couple of bamboo stakes and some burlap will do the trick. Don't close the top. The plant still needs sun and whatever rain it might get on warmer days.

So how do you know if your soil will have standing water that could kill your rhododendron? You do a test that we pretty much do with anything we plant. Dig the hole and then fill it with water. If the water doesn't disappear in a few minutes, you may not have good enough drainage. (If it does drain, just fill it again. This way when the new plant is settled in, all of the surrounding soil will be nice and moist.) You need to find a happy medium between soil that doesn't drain and soil that drains too fast. You don't want stagnant, standing water, but neither do you want the plant to dry so quickly that you will have to spend all of your time watering it. If your soil is not optimum, did a much bigger hole than you need and then amend the soil before replacing it when you plant the rhododendron. The old time formula is one third bark, one third peat moss and one third garden loam. A nice coarse mix is what you're looking for, up to one third air spaces - space for water to get in to the roots and space for the extra water to drain on through and not sit and rot the roots. The late Hank Shannen (hope I spelled that right) from Rare Find Nursery, recommended cutting the root ball about a third of the way up from the bottom twice (in an X) and then spreading the root ball out sort of flat. Be sure there is plenty of new soil underneath so all of the roots are in contact with the soil. They tend to be really root bound when you buy then and this gets their roots spreading into the surrounding soil faster and helps to be sure they'll be absorbing water as well as they can and not strangling themselves as the rootbound rootball often tends to just grow in on itself and not get out where it needs to be.
Another trick I almost forgot, and this is good for any plants you buy, when you bring them home, submerge the root ball in water until air bubbles stop coming up. This makes sure it is thoroughly wet before it gets plants.

After you get the rhododendron planted, you should give it a good mulch. Eventually it will provide its own mulch as it sheds leaves, but in the beginning, you'll have to provide the mulch. Things that don't work are peat moss - dries too fast and acts like a thatched roof to shed water and see that none gets to the plant - and black plastic. Sure, plastic keeps the weeds away, but no water gets in and it will just smother the plant. Shredded leaves work well - just run the lawn mower over them. If you have lots of leaves, you can try black bag composting. Put the damp, shredded leaves in black garbage bags and leave them in an out of the way place for 6 months to a year. When finished, you will have soft, wonderful compost, all ready to mulch your plants. We also use pine needles for a lot of the things that like an acid soil. We have plenty of pine trees in our woods, so collecting them is time consuming, but wonderful for the plants. I just try to take a bit from here and a bit from there, so as not to take too much away from the pines.

Watering: Drip irrigation is wonderful and the plants love it, but if that's not an option, a hose or watering can is fine. You don't have to worry about burning the leaves on these like you do on some more delicate plants, so water them when it is convenient. Actually a summer afternoon shower that cools them off somewhat will be as much appreciated by them as it would be by you.

Just make sure to water deeply so that you don't let the rootball dry out. If that happens, sometimes it is very difficult to get it to absorb water again, so be sure to water deep and often and as long as you have amended the soil so it drains well, you really won't be able to overwater. This is especially important on newly planted ones. Our established plantings rarely get anything not provided by mother nature. There are just too many of them and once the roots get out into the surrounding soil in a few years, they can pretty much take care of themselves except during extreme drought.

Fertilizing: We don't fertilize, depending instead on compost and mulch and that seems to make healthy plants for us. Some people like to give their rhododendrons a dose of fertilizer in the spring. Either works. Whatever you like.


Rhododendron aurtrinum (azalea)
More tomorrow, probably on diseases and other problems and some insects that might bother them. I'll say now that we've never had problems with anything on rhododendrons, but better to know what might happen and to know what to look for and how to fix it.
Jane

Monday, December 6, 2010

Rhododendrons


I started out to write about a very specific trait of rhododendrons - curling/rolling their leaves whenever the temperature falls much below 32 degrees. You can almost, at least here, tell when we get above freezing in the morning by looking at their leaves. These are only slightly curled; they can get into a much tighter roll as the temperature drops even more.

But there is so much to tell about rhododendrons, that I'm going to just spend a few days doing just that, now that I have a little more free time. It's too cold to work outside any more and I've finally finished all of the baskets and knitted hats and mittens that I hope to sell between now and Christmas.

I used to think that rhododendrons and azaleas were two very different plants. The flowers were similar, but, after all, they had totally different names. I now know that all azaleas are rhododendrons. Azaleas are either of the subgenus Pentanthera, the deciduous azaleas, or Tsustusti, usually evergreen. Now, by next year that might change as those in charge of such things seems to delight in confusing me, but as of now, that's where it stands.


Rhododendron (azalea) 'Satan'

Other traits of azaleas: they all have 5 lobes to their flowers and one stamen for each lobe. Rhododendrons have 2 stamens per lobe and the flowers on an azalea tend to be more tubular or funnel shaped.


Rhododendron PJM 'Olga Mezitt'


Lots more tomorrow with a bunch of other photos. Keep warm.
Jane

Saturday, November 13, 2010

Change - Continued

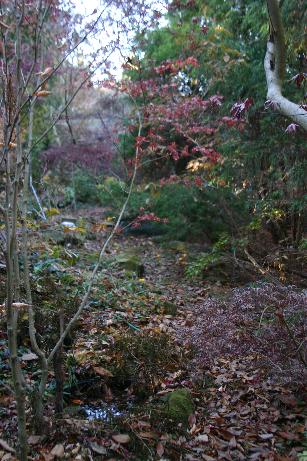
As promised, here are a couple of pictures of the garden I featured yesterday as it looks now. It was really hard to get these photos as the garden is so grown up and filled it was hard to find a good place to stand where I could get enough in to show everything. I gave up and settled for what I could get. This is the path looking south to north (if you want to compare it to the other one). The path is pretty much covered with leaves and the maples are bare since the leaves are on the ground. It is sometimes difficult to walk on the path because some of the low growing conifer wants to grow across the path. Other of the conifer are now bare at the bottom since they've grown quite tall and what used to seem like a private room, is now more like a room with a picture window where you can see into other parts of the yard. I don't think I expected that when things were originally planted. I'm starting to like it and the high shade it provides.
This is the same path looking north to south where you can see better, on the left side of the picture, the low growing conifer and the trunks of those that are taller.

And here is the reason I didn't get this posted last night before I fell asleep. Before ...


and after.


This is another section of the gardens as it looked recently ...


And as it was in 1995 when the pond liner was first put in. I had even forgotten just how empty the area was then. The indentation in the hill had been a watering hole for the cattle that lived here for many years when this was a working dairy farm. It is spring fed, but dried up in the summer. By lining it, we can keep it filled even in summer and it provides a place for waterlilies, lotus and some unusual cattails and iris.
So, if you live in a place long enough, and you have a good memory or old photos, you can see just how your garden evolves. There are always little changes year to year as I plant new things and other things grow. And there are the seasonal changes from a winter garden dominated by conifer to a spring one awash in daffodils, to summer with large swaths of daylilies and fall with the wonderful colors. Each season has its own personality and I love them all. I guess that's why I'm a gardener.


Thursday, November 11, 2010

Change in the Garden

After writing about un-gardening last time, I've been thinking about how gardens change. We have a smallish garden to the west of the house which we have always called the Japanese Garden. In all, it's probably about 50 by 75 feet. At first it looked like the picture above - rocks, small ponds, a few trees and lots of sun. This picture was taken in 1995.


This is a year of 2 later of the center pond and its maple tree.

And this is the same maple tree now. It would be a lot bigger, but we've spent a lot of time shaping it and pruning it to keep it in scale with the garden.


Looking north to south, there is a nice grass path and various conifer. This was about 1998.


By 1999 the grass is gone and we have added a gravel path and lots of rocks. This is the view looking south to north.


And the same view looking north to south.


In another year, things have grown and the magnolias are flowering better.
If I had planned better, I'd have a bunch of current photos, but I decided to write this at about 10:30 PM and it's a bit dark for garden photography at the moment, so I'll make this a 2 parter and finish up tomorrow. I can tell you that the garden is now too shady for a lot of the things that were there originally. The low growing conifer aren't so low growing any more and most have matured nicely. Those that haven't have been transplated or just cut down. It is now home to hostas, ferns, gingers, mosses, woodland peonies, hellebores and a host of other things. No longer happy there are the pitcher plants, creeping willows (though the bunnies had something to do with that), the Franklinia and a small waterlily. In addition to the conifer, the garden is dominated by a couple of large magnolias and lots of Japanese Maples. As you reach the back of the garden, going up the hill, in addition to the conifer, there are 2 ancient and very tall pines that were here before we bought the place, some rhododendrons and a couple of Witchhazels. So, tomorrow, I'll post some current pictures, though it may be hard to get good ones, the garden having grown up as much as it has. Just wish I had thought of doing this before the peak of fall bloom had passed for the maples.
Jane


Sunday, October 31, 2010

Hydrangeas

Today is what I would call and "un-gardening" day. My own word, I guess, but I use it for when I un-do a garden. We planted a whole garden with hydrangeas a dozen years ago, maybe a little longer ago than that. They didn't bloom right away, but grew wonderfully and had become quite large.

This one, Hydrangea macrophylla 'Blue Wave', is a recent acquisition, planted in another part of the garden, and it does bloom, though this photo was taken the first year and was quite blue, while this year's blooms were pink. It all depends on the pH of your soil. More acid means blue blooms.

This one, Hydrangea macrophylla 'Mariesii', apparently bloomed once, though I don't remember when. I know it bloomed because I have a photo of it. I don't think it has bloomed since.

This one, Hydrangea macrophylla 'Nikko Blue', is the only one that blooms. It blooms almost every year, though it is a much smaller bush, not more than 2 feet tall - some of the others were approaching 5 feet. Maybe because it is closer to the ground, the stems on this one aren't as likely to freeze. Because it blooms, it was spared the shovel this afternoon. I potted up pieces of several of the others that had made reasonable sized offshoots and will offer them for sale in the spring to people who live in places where they will bloom.
Non-bloom in hydrangeas is usually caused by winter damage to stems. Since hydrangeas bloom on last year's stems, if they winter kill you won't have any bloom. That was the problem here. So... the hydrangea bed is gone and has been replaced by a couple of gorgeous dogwoods and will be filled in with hostas in the spring.
I honestly hate 'unplanting' things, but I've learned to think of it sort of like rearranging the furniture. If things aren't working, just move them. If they really aren't working, get rid of them. Life is too short to live with plants that aren't doing what they're supposed to be doing. There are just so many wonderful things waiting to take their place.

Now, the hydrangeas that I co-exist with better are those on which I don't really expect blooms. It's not that these can't or don't bloom, just that since they rarely do, you plant them for the leaves and don't worry about the rest. This first one is Hydrangea macrophylla 'Lemon Wave' which has green and white and yellow leaves, no 2 alike.

My other favorite macrophylla hydrangea is 'Wave Hill', a green a white variegated one.

But if you really want bloom, at least in any place where the stems will freeze over the winter, skip the macrophyllas and get and Annabelle. This is a large bush that I think I've probably written about before. The blooms are large and are great for dried arrangements all winter. They go from green to white and last for quite awhile. They grow in light shade - actually prefer it, and seem to be a bit tolerant of at least minor drought.
So my compost heap has a bunch of hydrangeas and I have a redone garden. Not bad for an afternoon's work.
Jane

Wednesday, October 13, 2010

Viola labradorica

This is not an especially unusual plant, but anything that is blooming now in mid October has to be considered kind of special. Even more unusual to have a violet blooming this time of year.
Viola labradorica is also sometimes called Alpine Violet. The foliage is even tinted deep dusky violet. It is smaller than the usual wild violets and spreads by stolons sort of like a strawberry, which means that if you have one this year, you will have many next year. It also spreads by seeds. I have little colonies spread throughout the gardens and it never really would be considered invasive despite its tendencies to expand. Hardiness zones are zones 3 through 8.
Their main bloom season is in the spring, but they bloom here off and on all throughout the growing season. They will grow in sun to quite deep shade, though in the south, shade will be preferred. They prefer moist but well-drained soil. These violets will even tolerate a bit of light foot traffic, and given their diminutive size at only about 4 inches tall, they might be good between stepping stones, though I haven't tried using them in that way.
Labrador violets are native to the northern United States, eastern Canada and Greenland.
They are readily available from quite a number of mail order nurseries and aren't a bit expensive. I enjoy having them pop up here and there and should they ever get out of hand, they are very easy to thin out, unlike the other wild violets that we have here.
Jane

Wednesday, October 6, 2010

Fall Crocus

No, this picture wasn't taken last spring. These are the little known fall crocus, Crocus sativus is the one shown. There are also a number of others. This one is good down to zone 5, likes to be planted in rich, well-drained soil and to be divided occasionally. It is native to the Mediterranean. This is the crocus from which saffron is obtained. It takes the styles from 4000 flowers to make an ounce of the spice. Now you know why it is so expensive. They come up seemingly overnight, no leaves visible (they were there in the spring, I think). The blossoms close at night and on cloudy days.

The next two pictures are of another fall blooming crocus. This first is Colchicum cilicium. They have very large leaves in the spring - very un-crocus-like - and then send up many blooms in the fall. They finished blooming a week or so ago.


This last one is another colchicum called 'Lilac Wonder'. There are also white versions, but most you find will be some shade of pink of violet. The genus also includes some spring and summer bloomers, but I haven't grown them. Plenty of other crocuses in the spring. What I really appreciate are these fall bloomers. They like moderately fertile, not overly dry soil in sun or light shade. They also tend to appear suddenly. One day a bare spot, the next a full clump of blooms.
Too much to do outside this time of year - weeding, pruning, weeding, transplanting, weeding ... you get the idea.
More when I get a chance.
Jane